


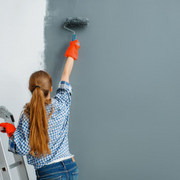

Overview of Epoxy Paint for Swimming Pools
Epoxy pool paint is one of the strongest coating options for swimming pools and spas. It is designed to protect the pool surface, improve appearance, and make the surface easier to maintain when it is applied correctly.
For pool owners with concrete, plaster, gunite or fibreglass pools, epoxy paint can be a practical renovation option. But the honest truth is this: epoxy paint is only as good as the surface preparation. If the pool is dirty, damp, chalky, loose, oily or badly prepared, even a good epoxy system can fail.
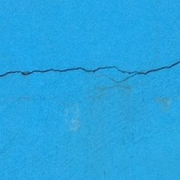
Do not use epoxy paint on a pool with cracks, previous crack repairs, or any risk of movement. Epoxy paint will not strengthen the pool structure and may fail if the surface continues to move. For cracked or unstable pool surfaces, a fibreglass lining system is the better option because it adds a reinforcing layer before the final finish is applied.
Shop for fibreglass pool lining kits here:
Shop epoxy pool paint and the correct preparation cleaner here:
-
Ramuc Clean & Prep for Epoxy Application - 5L
https://swemgat.com/products/epoxy-clean-prep-before-paint -
Ramuc Pool Epoxy
https://swemgat.com/products/ramuc-pool-epoxy

What is epoxy pool paint?
Epoxy pool paint is a two-part coating system used to paint swimming pools and spas. It is made from two components that are mixed together before application.
With Ramuc Pool Epoxy, the product is supplied as:
- Part A: the colour component
- Part B: the base component
The mix ratio is 1:1 by volume, meaning equal quantities of Part A and Part B are mixed together before painting.
Once mixed and applied correctly, epoxy paint forms a hard, protective coating over the pool surface.
Why use epoxy paint in a swimming pool?
Epoxy paint is popular because it offers:
- Strong surface protection
- Good adhesion when the surface is prepared correctly
- Improved chemical resistance
- Better stain resistance
- Better abrasion resistance than many basic coatings
- A clean, renewed pool appearance
- Easier surface maintenance
Ramuc Pool Epoxy is designed to protect concrete, plaster, gunite and fibreglass swimming pools and spas. Two coats can offer up to 8 years of service life, depending on preparation, application, pool usage and water care.
Available colours
Ramuc Pool Epoxy is available from Swemgat in colour options such as:
- White
- Dawn Blue
- Charcoal
The product is supplied in a 10 litre paint pack, made up of:
- 5L Part A
- 5L Part B
Clear UV Sealer is also included as part of the system.
When should you consider epoxy pool paint?
Epoxy paint may be suitable when:
- The pool surface is structurally sound
- The old surface is stained but not crumbling
- The pool needs a cosmetic refresh
- You want a durable painted finish
- The existing pool surface is concrete, plaster, gunite or fibreglass
However, epoxy paint is not a miracle fix for a damaged pool. If the plaster is hollow, weak, crumbling or badly cracked, rather use a fibreglass-pool-lining-solution.
Surface preparation is the most important step
If there is one thing to remember, it is this:
Do not paint over dirt, dust, loose material, oil, scale or damp surfaces.
Before applying epoxy paint, the pool surface must be properly cleaned and prepared. This is where Ramuc Clean & Prep is used.
Ramuc Clean & Prep Solution is used to clean concrete, plastered and fibreglass surfaces before epoxy pool paint is applied. It helps to degrease the surface, dissolve mineral deposits and increase surface porosity to improve adhesion.
Unlike some acid-based cleaners, Ramuc Clean & Prep neutralises when diluted with water and is biodegradable. It is also safe to use near plants and grass when used as directed.
Ramuc Clean & Prep coverage
Ramuc Clean & Prep is supplied in a 5L container.
Approximate coverage:
- 50 to 100 square metres per 5 litre
Application method:
- Garden sprayer
Important safety note:
Wear safety goggles with side shields, rubber gloves, protective clothing and suitable footwear when applying surface preparation chemicals.
Basic epoxy pool painting process
Step 1: Inspect the pool surface
Before painting starts, inspect the pool properly.
Check for:
- Hollow plaster
- Loose or flaking old paint
- Cracks
- Weak or crumbling areas
- Oil or chemical contamination
- Scale and mineral deposits
- Damp areas
Repair weak or damaged areas before painting. Painting over a failing surface will not solve the problem.
Step 2: Clean and prepare the surface
Use Ramuc Clean & Prep Solution according to the container directions.
The goal is to remove contaminants and create a surface profile that helps the epoxy bond properly.
Use a pressure washer to remove loose material, debris and dirt.
If the surface is exceptionally hard, sanding with #80 grit sandpaper is recommended to create a better surface profile before applying the first coat of epoxy.
Step 3: Allow the surface to dry
The surface must be dry before painting.
A practical way to check dryness is with a condensation test:
Tape a clear plastic sheet of about 50cm x 50cm onto several areas of the pool, including the deep end wall and floor. Leave it for about 4 hours during the day.
If condensation forms underneath the plastic, the surface is still too damp to paint. Remove the plastic, wait another 24 hours and test again.
Do not rush this step. Moisture trapped under epoxy can cause coating failure.
Step 4: Check the weather
Epoxy pool paint should be applied only when the weather is suitable.
Ramuc Pool Epoxy should be applied when:
- The temperature is above 15°C
- The temperature is not warmer than 30°C
- Rain is not expected
- The surface can remain dry during the curing period
Do not apply epoxy paint when rain is imminent.
Also turn off garden irrigation and nearby watering systems before painting starts.
Step 5: Mix the epoxy paint
Ramuc Pool Epoxy is mixed at a 1:1 ratio by volume.
Examples:
- To make 4L of paint, mix 2L Part A with 2L Part B
- To make 2L of paint, mix 1L Part A with 1L Part B
Mix the two parts thoroughly.
Mixing batches of a maximum of 4L at a time.
Once mixed, the product has a pot life of about 3 hours, so do not mix more than you can apply in that time.
Step 6: Apply the first coat
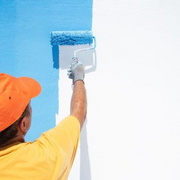
Apply the first coat using suitable epoxy paint rollers and brushes.
Use masking tape to protect inlet spouts, fittings, mosaics or areas that should not be painted.
Do not allow rain, irrigation water or pool water to touch the surface during painting and the initial drying period.
Step 7: Apply the second coat
Apply the second coat after 16 hours, but no later than 72 hours after the first coat.
If more than 72 hours pass before the second coat is applied, the first coat should be lightly sanded before recoating.
This is important for proper bonding between coats.
Step 8: Apply the Clear UV Sealer
After the second epoxy coat, apply the Clear UV Sealer as the final coat.
Make sure no rain or water comes into contact with the painted surface for at least 6 hours after painting.
Step 9: Allow the coating to cure
Epoxy paint may become touch-dry within a few hours, but that does not mean it is ready to be filled with water.
Allow the coating to cure properly before refilling the pool.
Drying time after two epoxy coats:
- Outdoor pool: 5 to 7 days before filling
- Indoor pool: 10 to 14 days before filling
For practical planning, allow at least 7 dry days for an outdoor pool.
If rain occurs during the drying period, sponge the surface dry after every occurrence of rain and allow extra drying time.
Step 10: Fill the pool and balance the water
Once the epoxy coating has cured, fill the pool with water.
After filling, balance the pool water correctly.
Important target levels:
- Total Alkalinity: 80 to 120 ppm
- pH: 7.2 to 7.6
- Free Chlorine: 1 to 3 ppm
Poor water balance can damage pool surfaces, shorten coating life and create stains.
Ramuc Pool Epoxy coverage
Approximate coverage for 10L Ramuc Pool Epoxy:
- Bare surfaces: 18 to 25 square metres
- Recoats: 37 to 43 square metres
Coverage depends on surface condition, porosity, preparation and application method.
A rough or bare surface will use more paint than a smooth recoated surface.
Tools required
Tools are not supplied with the epoxy paint.
You will typically need:
- Paint brushes
- Epoxy paint rollers
- Roller handles
- Drill with paint mixer
- Masking tape
- Pressure washer
- #80 grit sandpaper, if required
- Protective clothing
- Safety goggles
- Rubber gloves
Epoxy paint versus fibreglass lining
- Epoxy paint and fibreglass lining are not the same thing.
- Epoxy paint is a coating system. It is used to renew and protect a sound surface.
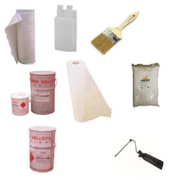
- Fibreglass lining is a resurfacing system using resin, fibreglass mat, tissue, top coat and catalyst. It is often used when the pool surface needs a stronger lining system.
- Choose epoxy paint when the existing surface is sound and suitable for coating.
- Consider fibreglass lining when the surface needs more than paint, especially where there are surface integrity issues that a coating alone will not solve.
Common epoxy pool paint mistakes
Painting too soon after cleaning
If the surface is still damp, wait. Moisture is one of the biggest enemies of epoxy paint.
Skipping proper cleaning
Pool surfaces collect oils, minerals, scale and dirt. These must be removed before painting.
Painting loose or weak plaster
If the plaster is hollow or crumbling, repair it first. Paint cannot make a weak surface strong.
Mixing too much paint at once
Once Part A and Part B are mixed, the clock starts. Mix only what you can use within the pot life.
Waiting too long before the second coat
The second coat should be applied between 16 and 72 hours after the first coat. If this window is missed, soft sanding is required before recoating.
Refilling the pool too early
Do not rush the curing time. Filling the pool too early can compromise the finish.
Who can apply epoxy pool paint?
A practical DIY owner or pool technician can apply epoxy pool paint, provided they follow the instructions carefully.
This is not difficult work in theory, but it does require discipline:
- Prepare the surface properly
- Mix correctly
- Watch the weather
- Apply within the correct time windows
- Allow proper curing time
- Balance the water after filling
If you cut corners, the finish can fail. That is the reality with pool coatings.
Need help before ordering? Send Swemgat a WhatsApp message to 0824041533 with photos of the pool surface, close-ups of damaged areas and the pool size.