


How to Fibreglass a Swimming Pool (DIY Pool Relining Guide)
A cracked or leaking swimming pool doesn’t necessarily mean a full rebuild. Many concrete pools can be restored by installing a fibreglass lining, creating a waterproof and durable new interior surface.
Fibreglass lining is commonly used in South Africa to repair cracked pool shells, stop leaks, and upgrade rough marblite finishes. When installed correctly, a fibreglass lining can last 10–15 years or longer while significantly reducing maintenance.
In this guide you’ll learn:
- When to consider fibreglass relining
- The benefits of fibreglass pool surfaces
- Step-by-step installation process
- Materials required for DIY installation
For DIY installers and pool contractors, most of the materials needed are available here:
👉 https://swemgat.com/collections/fibreglass-swimming-pool-linings
When Should You Fibreglass a Swimming Pool?
Fibreglass relining is often chosen when a concrete pool begins showing structural or surface problems.
Common reasons include:
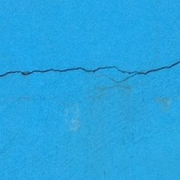
1. Cracked Pool Shell
Soil movement or structural stress can cause cracks in concrete pools. Fibreglass creates a flexible waterproof membrane that seals these cracks.
2. Rough or Worn Marblite
Old marblite becomes porous and rough over time. Fibreglass provides a smooth, modern finish.
3. Persistent Pool Leaks
Some leaks are difficult to locate in older concrete pools. A fibreglass lining acts as a complete waterproof barrier.
4. Algae Problems
Porous plaster allows algae to embed into the surface. Fibreglass is non-porous, preventing algae growth within the material.
Benefits of Fibreglass Pool Linings
Fibreglass has become a popular pool lining material for both professionals and DIY renovators.
Easy Cleaning
Smooth surfaces reduce dirt buildup.
Reduced Chemical Usage
Because algae cannot penetrate the surface.
Waterproof Protection
Seals cracks and protects the concrete shell.
Smooth Swimming Surface
Especially when surface tissue is applied over the fibreglass mat.
You can view fibreglass lining materials here:
👉 https://swemgat.com/collections/fibreglass-swimming-pool-linings
Step 1: Prepare the Pool Surface
Preparation determines the success of the entire installation.
The pool interior must be:
- Clean
- Completely dry
- Free of loose plaster or paint
Preparation tasks include:
- Remove loose plaster
- Smooth old mosaic tiles using a grinder with a C16 disc
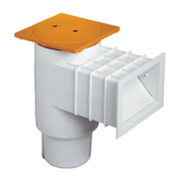
- Cut grooves around lights, weirs, and inlet fittings
- Grind a ±20mm slot beneath coping tiles
- Repair holes with cement plaster or marblite
Once complete, the pool shell should be smooth and structurally sound.
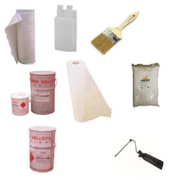
Step 2: Prepare Fibreglass Materials
Fibreglass installation requires several specialised materials.
These materials are available here:
👉 https://swemgat.com/collections/fibreglass-swimming-pool-linings
Typical materials include:
- Fibreglass mat
- Surface tissue (recommended for smooth finish)
- Fibreglass resin
- Pool top coat
- Catalyst hardener
- Fibreglass putty powder
- Acetone for cleaning tools
Tools required:
- Paint rollers
- Aluminium consolidation rollers
- Paint brushes
- Drill with paint mixer
- Buckets
- Grinder and sanding discs
Step 3: Mix Resin and Catalyst Correctly
Resin and top coat must always be mixed with catalyst hardener.
Typical ratios:
Warm weather:
1% catalyst
Cold weather:
Up to 2–3% catalyst
Example mixture:
1 litre resin =
10ml – 30ml catalyst
Higher catalyst levels speed up curing.
Ideal installation temperature: 18°C – 28°C
Mix small batches (2–5 litres) to avoid waste from fast curing.
Step 4: Apply Resin Primer
Using a paint roller, apply a thick coat of fibreglass resin directly onto the prepared pool surface.
Allow the resin to reach a tacky stage before laying fibreglass mat.
Step 5: Install Fibreglass Mat
Cut manageable sections of fibreglass mat.
Place the mat onto the tacky resin surface and flatten using an aluminium roller.
Apply additional resin over the mat until fully saturated.
Continue until the mat lies flat with no trapped air bubbles.
Step 6: Apply Surface Tissue (Recommended)
For a professional finish, install surface tissue over the fibreglass mat.
Apply resin over the tissue while rolling it flat.
Benefits include:
- smoother final surface
- better top coat appearance
- improved durability
Step 7: Cover Entire Pool Surface
Repeat the process across the entire pool:
- walls
- floor
- steps
- corners
- around fittings
Ensure fibreglass is tucked securely into grooves around fittings and coping tiles.
Allow the laminate to cure for 4–12 hours until fully hardened.
Step 8: Sand and Smooth the Surface
After curing, some uneven areas may appear.
Sand using:
- sandpaper for corners
- grinder with P36 sanding discs for large areas
Aim for a consistent smooth finish.
Step 9: Patch Imperfections
Mix:
- resin
- catalyst
- fibreglass putty powder
Fill small holes or uneven areas using a putty knife or trowel.
Allow to dry and sand again.
Clean the entire surface before applying the top coat.
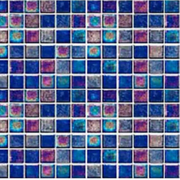
Optional: Install Mosaic Pool Patterns
Decorative pool designs can be added at the waterline or on steps.
Process:
- Apply coloured top coat background
- Allow to dry
- Apply clear top coat
- Position mosaic or printed pattern
- Seal with additional clear top coat layers
This method is commonly used for waterline tile effects or pool graphics.
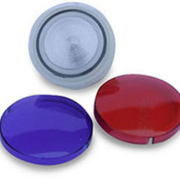
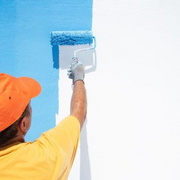
Step 10: Apply the Final Top Coat
The final protective layer is fibreglass top coat.
Apply evenly using a roller or brush.
Common colours include:
- White
- Blue
- Charcoal
- Custom colours
You can find fibreglass top coat materials here:
👉 https://swemgat.com/collections/fibreglass-swimming-pool-linings
Allow Proper Curing
Fibreglass linings must cure before filling the pool.
Recommended curing time:
7 days minimum
If rain occurs during curing, dry the surface immediately afterwards.
After curing:
- Clean the surface
- Fill the pool with water
- Balance the pool chemistry
Once balanced, the pool is ready to use.
Basic Materials Required
Approximate quantities:
| Material | Quantity |
|---|---|
| Fibreglass Mat | Pool surface + 20% overlap |
| Surface Tissue | Pool surface + 20% overlap |
| Resin | 1.3–1.7kg per m² |
| Top Coat | 0.6kg per m² |
| Clear Top Coat (optional) | 0.6kg per m² |
| Catalyst Hardener | 1–4% mixture |
| Fibreglass Putty Powder | As required |
Where to Buy Fibreglass Pool Lining Materials
If you are planning a DIY pool renovation, you can find the required materials online here:
👉 https://swemgat.com/collections/fibreglass-swimming-pool-linings
Swemgat supplies materials used by pool builders, contractors and DIY renovators across South Africa.
Related Pool Renovation Guides
You may also find these helpful: