How to reline a swimming pool with fibreglass. Why and when to consider fibreglass.
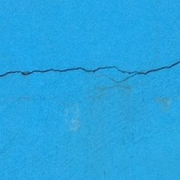
Fibreglass is a Glass-Fiber Reinforced plastic (GRP) material that pool builders and Do-It-Yourself (DIY) enthusiasts use as swimming pool lining for concrete pool shells where the soil conditions is not good, i.e. soil movement may occur or to make a cracked pool shell watertight.
Other benefits of using fiber pool linings:
- Fibreglass is easy to clean;
- It is non-porous and therefore algae can not grow into it like for porous surfaces such as marblite (marble plaster);
- The surface smoothness is generally very good, obviously depending on the plastered concrete surface under it. A much smoother surface is also obtain if a layer of surface tissue is applied on top of the fibre mat.
Overview of process to install a fibreglass swimming pool lining:
- The cement plastered or marble plastered surface should be dry, clean and all loose plaster should be removed.
- Old mosaic tiles should be sanded, using a larger grinder with a C16 disc to smooth the surface.
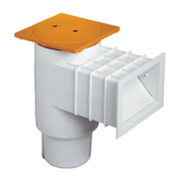
- For stronger holding of the fibreglass mat, cut a small groove around light; weir and water-inlet fittings that will provide a space for more fibreglass mat to be tugged in. Also, using a diamond grinder blade on the grinder make a +-20mm horizontal cut directly under the coping tiles around the pool to make space for the fibreglass mat to be tugged in during installation.
- Fill large holes and uneven surfaces with cement-plaster or marblte.
- At this stage your swimming pool\'s interior surface is now clean, dry and ready for the fiber-lining installation to start.
- Get empty buckets; paint brushes and your drilling machine with paint mixer* ready.
- Take note that you will mix resin* and top coat* always with hardner at a rate of 1% per volume in warm weather up to a maximum of 3% hardner in cold weather. Thus, for every 1L (1000ml) of resin you should add 10ml to 40ml hardner*. The more hardner (catalyst) you add, the quicker the mixture dry.
- The ideal daytime temperature for installation is between 18 and 28 Degrees Celsius.
- Mix small quantities, 2 to 5 Litre at a time to eliminate waste due caused by mixtures thickening (drying) before the painting application is finished.
- LET'S START NOW!
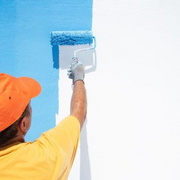
- Using a 160mm or 225mm paint roller* apply a thick coat of resin (as primer) on the pool's surface and allow to become sticky-dry;
- Cut a manageable size of fibreglass mat* and lay flat on coated stick-dry surface, roll flat using aluminium roller*
- Using the paint roller again, paint resin now over fibreglass mat ensuring it remains flat;
- OPTIONAL, but highly recommended: Cut a piece of surface tissue and lay over the coated fibreglass mat. Using the paint roller again, paint the surface tissue also with resin and keep ensuring no bubbles develop under the lining and tissue remain flat.
- Cover the swimming pool's entire surface by repeating step 10 to step 12 until finished, also tugging in the resin-coated fibreglass mat into the cut made under the coping tiles and the grooves;
- Allow the resin-coated fibreglass mat to dry for 4 to 12 hours, until very hard;
- THE REALITY: In some spots the lining will have uneven areas that should be sanded. Use ordinary sanding paper for corners and a large grinder with P36 sanding disc* to sand the pool\'s walls and floor to an acceptable final smoothness.
- Using a putty-knife or plastering trowel, patch grooves, uneven areas and all small holes with a mixture of resin; hardner and fibreglass putty powder* Allow to dry and sand surface again until you\'re satisfied with the surface smoothness.
- Sweep and/or vacuum entire pool surface to prepare for final coat (top coat).
- OPTIONAL: To install a printed pattern on waterline and steps; or even a dolphin or other picture. Apply top coat as background colour and allow to dry; then Clear Top Coat after which you stick the pattern or tissue-paper picture onto it; allow to dry and apply several layers of clear top coat over it. After the printed pattern is dry, mask off with masking tape* to make painting of top coat easier.
- FINAL TOP COAT: Mix top coat* and paint entire surface using a fibreglass-resin-roller or a 100mm paint brush*. Available in White; Blue, Charcoal or any special mixed colours.
- 1 DAY LATER: Check surface smoothness and correct small spots (if required)
- CURING PROCESS: Allow fibreglass lining to cure for at least 7 days before filling swimming pool with water to provide time for proper chemical reaction and bonding of resin fibres.
- If rain occurs during the curing period, dry surface immediately with mop afterwards.
- Clean surface before filling with water. Balance water chemistry.
- SWIMMING HAPPILY EVER AFTER!
Basic materials and tools required to line a pool with fibreglass:
[Approximate quantities indicated in square brackets]
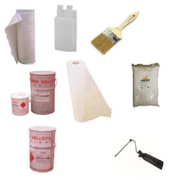
- Fibreglass Mat [entire pool surface area plus 20% allowance for overlapping]
- Optional, but highly recommended: Surface Tissue [entire pool surface area plus 20% allowance for overlapping]
- Resin [1.3 to 1.7 kg per m2]
- Optional: Clear Top Coat [0.6kg per m2] & Printed mosaic patterns or pictures*
- Top Coat [0.6kg per m2]
- Catalyst hardener [use a minimum of 1% catalyst in warm weather to maximum 4% catalyst per volume of resin or top coat]
- Fibreglass putty powder
- Acetone for cleaning of tools and hands
- C16 & P36 grinder discs; pool paint rollers; pool paint brushes; putty knife; buckets; cleaning cloths etc.

