


How to Fibreglass a Swimming Pool (Step-by-Step Guide)
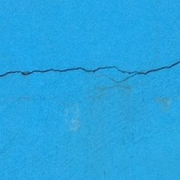
Concrete swimming pools are strong, but over time many develop cracks, leaks, or rough surfaces that become difficult to maintain. One of the most reliable ways to restore and protect a pool shell is by installing a fibreglass lining.
Fibreglass — also known as Glass-Fibre Reinforced Plastic (GRP) — is widely used by professional pool builders and DIY renovators to create a waterproof, durable interior lining for concrete pools. It is particularly useful where soil movement occurs, where structural cracks have developed, or when an old plaster surface needs a long-term upgrade.
This guide explains when fibreglass lining makes sense, why it’s popular, and how the installation process works.
Why Consider Fibreglass Pool Lining?
Fibreglass linings offer several practical advantages compared with traditional marble plaster or marblite finishes.
1. Easy to Clean
Fibreglass surfaces are smooth and non-porous. Dirt and contaminants struggle to adhere, making routine cleaning far easier.
2. Resistant to Algae Growth
Unlike porous finishes such as marblite, algae cannot embed itself into fibreglass surfaces. This helps reduce chemical consumption and maintenance effort.
3. Waterproofing for Cracked Pools
Fibreglass creates a continuous waterproof membrane that helps seal cracked or slightly moving concrete pool shells.
4. Smooth Swimming Surface
When installed correctly — especially with surface tissue finishing — the result is a comfortable, smooth pool interior.
Overview of the Fibreglass Pool Relining Process
Installing a fibreglass lining involves careful preparation followed by layering fibreglass mat and resin. Below is a simplified overview of the process used by professionals and experienced DIY installers.
1. Prepare the Pool Surface
The underlying pool surface must be properly prepared before installation begins.
Steps include:
- Ensure the cement or marble plaster surface is clean, dry, and structurally sound
- Remove all loose plaster
- Sand existing mosaic tiles smooth using a grinder with a C16 disc
- Fill holes and uneven areas with plaster or marblite
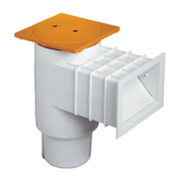
- Create grooves around fittings (lights, weirs, inlets) so fibreglass can be tucked in securely
- Cut a ±20mm groove beneath the coping tiles around the pool perimeter
Once complete, the pool interior should be dry, smooth, and ready for fibreglass installation.
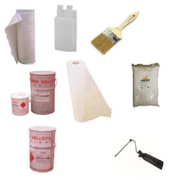
2. Prepare Tools and Materials
Before starting, assemble all necessary materials and equipment.
Essential materials include:
- Fibreglass Mat for swimming pools
- Surface Tissue for smooth finishing
- Fibreglass Resin
- Fibreglass Top Coat
- Catalyst hardener
- Fibreglass putty powder
- Acetone for cleaning tools
Typical tools:
- Paint rollers
- Fibreglass aluminium rollers
- Paint brushes
- Buckets
- Drill with paint mixer
- Grinder with sanding discs
- Putty knife or plaster trowel
You can find these materials in the Swemgat fibreglass pool lining collection.
3. Mixing Resin and Catalyst
Resin and top coat must always be mixed with catalyst hardener.
Typical mixing ratio:
- Warm weather: ~1% catalyst
- Cold weather: up to 2–3% catalyst
Example:
For 1 litre of resin, add 10ml to 30ml catalyst depending on temperature.
Higher catalyst percentages cause the mixture to cure faster.
Best installation temperature: 18°C – 28°C
Always mix small batches (2–5 litres) to avoid waste due to rapid curing.
Step-by-Step Installation Process
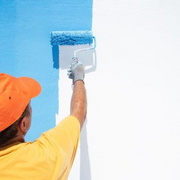
Step 1 — Apply Resin Primer
Using a 160mm or 225mm paint roller, apply a thick coat of resin directly onto the pool surface.
Allow the resin to reach a sticky (tack-dry) stage before applying fibreglass mat.
Step 2 — Install Fibreglass Mat
Cut manageable pieces of fibreglass mat and lay them onto the tacky resin surface.
Flatten the mat using an aluminium roller to remove air pockets.
Apply additional resin on top of the mat until fully saturated.
Step 3 — Apply Surface Tissue (Recommended)
For a smoother finish:
- Place surface tissue over the wet fibreglass layer
- Roll resin over the tissue
- Ensure no bubbles remain
Surface tissue significantly improves the final appearance.
Step 4 — Continue Across Entire Pool
Repeat the process across the entire pool surface:
- Walls
- Floor
- Steps
- Corners
- Grooves beneath coping tiles
Ensure fibreglass is properly tucked into all grooves and around fittings.
Allow the fibreglass laminate to cure for 4–12 hours until fully hardened.
Step 5 — Sand the Surface
After curing, some areas may feel uneven.
Use:
- Sandpaper for corners
- Grinder with P36 sanding disc for walls and floors
Aim for a smooth, consistent surface.
Step 6 — Patch Imperfections
Mix:
- Resin
- Catalyst
- Fibreglass putty powder
Use a putty knife or trowel to fill small holes, grooves, or uneven areas.
Allow to dry, then sand again until smooth.
Clean the entire pool surface before proceeding.
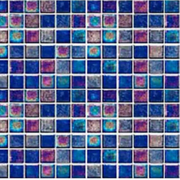
Optional: Install Decorative Patterns (highly recommended)
If desired, decorative patterns such as mosaics or dolphins can be added.
Process:
- Apply coloured top coat as base
- Allow to dry
- Apply clear top coat
- Place printed mosaic pattern
- Seal with multiple layers of clear top coat
Masking tape can be used to create neat waterline edges.
Final Step — Apply Top Coat
The final protective layer is fibreglass top coat.
Using a roller or paint brush:
- Apply evenly across the entire surface
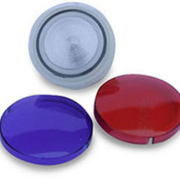
- Available colours typically include white, blue, charcoal, or custom mixes
See available options in the fibreglass pool lining materials collection.
Curing Time
After installation:
- Allow at least 7 days curing time
- Protect the surface from rain where possible
- If rain occurs, dry the surface immediately afterwards
Only after curing should the pool be filled with water.
Once filled, balance the water chemistry before swimming.
Materials Required (Approximate Quantities)
| Material | Typical Quantity |
|---|---|
| Fibreglass Mat | Pool surface area + 20% overlap |
| Surface Tissue (recommended) | Pool surface area + 20% overlap |
| Resin | 1.3 – 1.7 kg per m² |
| Top Coat | ~0.6 kg per m² |
| Clear Top Coat for printed tissue mosaics | ~0.6 kg per m² |
| Catalyst Hardener | 1% – 4% of resin/top coat volume |
| Fibreglass Putty Powder | As required |
| Acetone | Tool cleaning |
Final Thoughts
Fibreglass pool lining is one of the most durable ways to restore an ageing swimming pool. When properly installed, it can provide 10–15 years of waterproof protection, smoother surfaces, and easier maintenance.
For homeowners who want to repair cracks, stop leaks, or modernise an old pool interior, fibreglass remains one of the most reliable solutions available.